Paddleboarding is a sport that removed a lot of the barriers people previously had when it came to getting involved in water sports.
Paddleboards are generally longer, thicker and wider than traditional surfboards, this makes them much more buoyant and stable on the water.
Now although these things make paddleboarding easier and remove a lot of the barriers people once had, it does make transporting the board a great deal more difficult.
So just how do we transport a paddleboard to and from the water.
Well firstly to answer that question we need to first discover what sort of board we have, now by this I mean is the board rigid and solid like an epoxy board or is inflatable?
If you have a rigid paddleboard like an epoxy board you will most likely want to transport the board using suitable roof racks, if you have an inflatable board this can be deflated and rolled up into the provided carry backpack.
This is one of the reasons why over the years inflatable paddleboards have become the main focus of lots of the top brands such as Redpaddle co, Fatstick, Tower etc..
Now although the obvious ways of transporting your boards are noted above, are there any other ways in which we can get our boards from storage to the water?
Well yes there are actually a variety of ways which I will go into below.
Epoxy Rigid Board
Let’s first look at the more tricky of the two, the epoxy rigid boards.
These boards are often anywhere from 8’ 6” – 14’0” long and seeing as how they are rigid construction they can not be contorted to fit or squeeze into tight spaces for easy transport.
So just what are the different options available to us?
Fixed Roof Rack
Well the first method is by securing the board to a fixed roof rack.
A fixed roof rack is one that is secured to the top of the roof using the often provided locking points.
You will notice that some cars feature a flap that must be removed or pushed into to access the locking points.

Other cars (like my Volkswagen Touareg for example) have fixed roof bars that you can secure the roof racks too.
This is by far the safest, most secure and easiest way to secure your paddleboard to your roof ready to take wherever your heart desires.
The main drawback to fixed roof racks though is that they can sometimes be a bit on the steep side when it comes to cost.
Also based on the value of the items you often secure to a roof rack you really don’t want to go down the budget range.
With that in mind if you are looking to get a fixed roof rack for your car a brand I have also loved and trusted is Thule.
Again they are not the cheapest but they are certainly great products.
You can check out some Thule fixed roof racks by clicking the below image.

To get your board up and onto your roof rack, unless you are blessed with height and can comfortably reach the roof of your vehicle you will most likely want to slide the board on top of the roof from the back.
First hold your board vertically up so that the tail of the board is towards the ground and the nose of the board is pointing towards the sky, ensuring the top of the board is facing away from you lean the board forward onto the back of the vehicle or roof rack ensuring care is taken not to drop the board and cause damage to your vehicle or board.
Once it is leant against the vehicle you will want to lift the board and begin feeding it on to the roof rack.
Once the board is placed evenly on the roof rack you can secure them down using the required straps.
Normally you will use a traditional ratchet strap system to secure them in place.
Soft Roof Rack
The next option we have still involves a roof rack and securing your board to the top of your vehicle but it can offer a much cheaper alternative to getting fixed roof racks.
Soft Roof racks are as the name might imply are usually soft, soft roof racks are normally quite long when laid out as they feature two long straps that are divided by a long cushion section which acts as the support for your board on the roof.
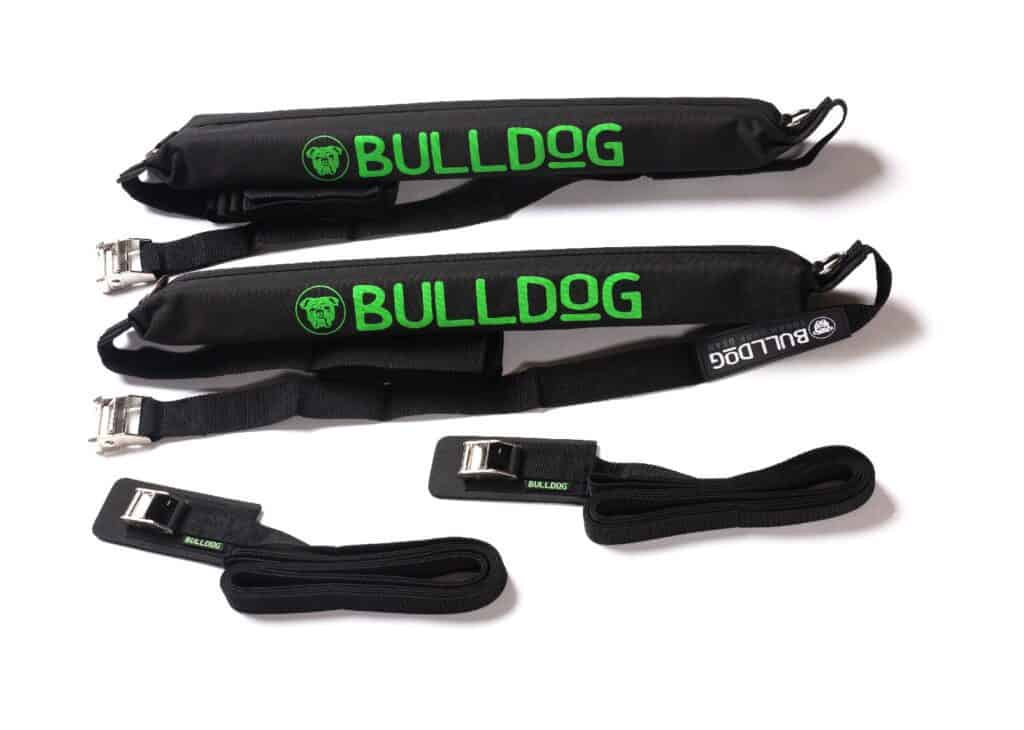
When you look at the two straps one will be shorter with a ratchet or locking mechanism on the end, while the longer strap often has a tapered flat edge that can be fed through the ratchet or strap.
To install a soft roof rack you will want to open both doors on either side of the car and lay the cushion section in the centre of the roof with the two straps dangling down each side of the vehicle.
Climb into the car and take both ends of the straps, feed the flat end of the strap though the ratchet or securing strap and then pull tightly to ensure the cushion is well secured down to the top of the roof.
You certainly don’t want the roof rack flapping around on the roof.
Repeat the process to the 2nd strap ensuring both cushioned sections line up.
Once the straps are on the roof and securely fastened we can lay the paddle on the roof.
Again if you can reach the top of the roof you will simply want to lift and place the board evenly across both roof cushions.
If you have a taller vehicle you will again want to hold your board vertically upright at the rear of the vehicle.
Ensure the tail of the board is down and the nose of the board is pointing towards the sky, with the face of the board pointing towards the vehicle, lean your board on to the rear of the vehicle or roof rack where possible.
Once you have carefully laid your board down, lift the board and begin feeding it onto the roof racks ensuring the board is evenly distributed across both straps.
On the edges of the cushioned parts of the straps you will normally see two little metal loops, one on each side.
The metal loops are designed to feed a strap through that will go over the top of the board to secure it to the roof rack.
Feed the end of the strap through the loop and throw the excess strap over the top of the board, loop this through the metal catch on the opposite side before passing it back over the board to be secured in the ratchet or securing clasp.
Repeat this process on the other cushioned section to ensure both the front and rear of the board are secured for travelling.
If you want to pick up an inflatable roof rack I suggest you click on the below image to check out the Alfa Gear Universal Roof Strap

No Roof Rack
So what happens if you need to put your board on the roof but you don’t have a roof rack at all?
Well you can actually fashion one out of some very common items.
It should go without saying though that this is done completely at your own risk and really if you plan on transporting your board regularly you invest in a roof rack.
This can be done in a couple of different ways.
The first way is much more achievable for the vast majority of us and that is using some ratchet straps and some towels.
I would recommend you wet the towels slightly to make them heavier, the moisture should also help prevent the towel from sliding around on the roof.

Roll the towels up until they are fairly thick and just slightly smaller than the width of your vehicle.
These towels will act as your soft roof racks.
Once the towels are in position, lay your board on top of the towels again ensuring the weight is distributed evenly.
Once the board is in place open up the doors of your vehicle and collect your ratchet strap.
Throw the flat end of the strap over the top of the boards so it lands by the open door on the opposite side of the vehicle,
Climb in the vehicle with your securing clasp/ ratchet in hand and reach for the flat end on the opposite side.
Pull the flat end through the clasp/ strap and tighten to secure the board to the roof.
Repeat this process to the other strap and check the board is tightly secured to the roof and doesn’t allow large amounts of movement.
The other option we have and honestly this is probably the preferred option, is to use sections of foam, there are a variety of different things we can use such as pipe lagging or pool noodles.
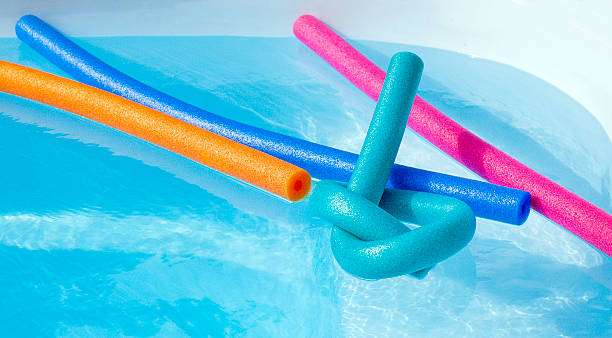
Once you have your sections of foam repeat the process as described above to secure your board to your roof.
Inside the Vehicle
If you really don’t want to or can’t secure your board to the roof, you may want to put your board in your vehicle.
Now this obviously does come with some caveats, for example if you have a particularly long board or alternatively don’t have the biggest of vehicles you will most likely struggle to get this in your vehicle.

The other issue you may find is that if you can get your board into your vehicle and slide it into the front seating area, your board may restrict your view from your side view wing mirror.
I have above mentioned how you would go about securing your board as per the particular method however, with this method I don’t have any information on your vehicle or your board.
With that being said if your board will fit in your vehicle I will leave it to you as to how you get it in there.
Without a Vehicle
So you want to get down to the water with your board but you don’t have a vehicle to use.
Well we have a few different options, we can take public transport but it will be awkward swinging a 10 foot board around on a bus or train.
The other option we have is walking or cycling.
You may be thinking that carrying your board and trying to walk or cycle for a considerable distance is going to be challenging.
And well yes, it would be.
Fortunately there are actually a few useful things that we can acquire for relatively cheap to make our journeys a lot easier
The first thing we will look at is the things you can acquire if you are walking.
Aids To Transport a Paddleboard When Walking
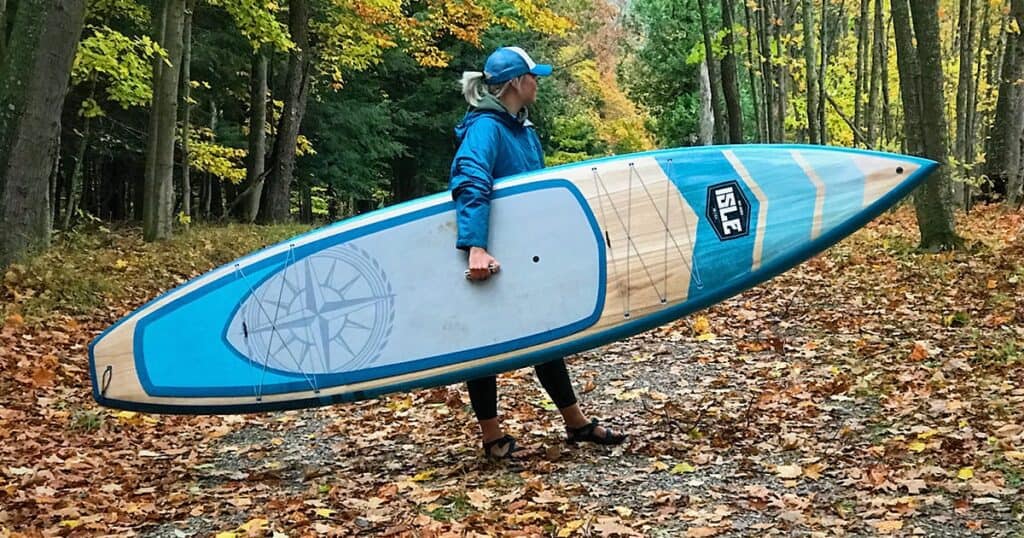
Carry strap – Although all paddleboards come with a carry strap it can be very difficult to hold the board for long periods of time, alternatively unless you have quite long arms you may even struggle to reach the handle and hold the board comfortably against your body.
This is where the carry strap can be a great asset.
The carry strap normally has two looped sections, one at each end of the long strap, in the middle of the strap there is usually a padded section.
Each loop is placed at either end of the board and then the board can be lifted and rested on the shoulder using the carry strap for easy transport.
The loops are often adjustable to account for different size boards that you may carry.
These straps come in a variety of different costs and nearly all of them do the exact same thing.
The main difference tends to be in the padding of the shoulder section and the overall quality of the materials.
I have attached an image below which contains a link below of one of my favourite ones that is fairly priced and comfortable on shoulder.

Trolley – The other method is using a trolley.
The trolley has been a common accessory for many kayak/ canoe enthusiasts.
Much like paddleboards they are usually large, awkward and relatively heavy.
The trolley normally consists of a frame connected to two large rubber all-terrain wheels.
The way in which the trolley works is you secure one end of the board to the frame and then you pull the board around from the opposite end.
This can make transporting the board very easy and convenient but it does mean you have a 10 foot plus board trailing behind you.
If you have to pull your board through particularly busy or narrow streets the trolley may not be the best option but it will definitely save your arms the trauma if you have a long way to go to get to water.
There are a variety of trolleys available today, the BIC sport trolley (seen below) is a fantastic choice if you paddleboard alone

If you paddleboard with a friend and need to transport two boards then you may want to go for the double SUP airless carry.

You can see both by clicking on the relevant picture, this will re-direct you to Amazon where you can check out current prices.
Aids To Transport a Paddleboard When Cycling
Board rack for bikes – The trolley can actually be used for this but then not only are you dragging along the board you have the added length of the bike.
The easiest most convenient way of transporting your board whilst on a bike is using the bike board rack.
The bike board rack has two holders, one that fixes to the front of the bike and one that fixes to the rear of the bike.
The front holder usually mounts on to the handle bar stack while the rear holder mounts on to the seat bar.
Once installed you can simply slot your board into the holder and then start your cycle.
The thing to be careful of with these though is they are often not designed for boards exceeding 12 feet.
Now I will be honest having never used these I don’t have any personal recommendations although looking through the reviews the best one I can find to suit paddleboards is by a company called Moved by Bikes..
You can view the bike rack on amazon by clicking the image below.

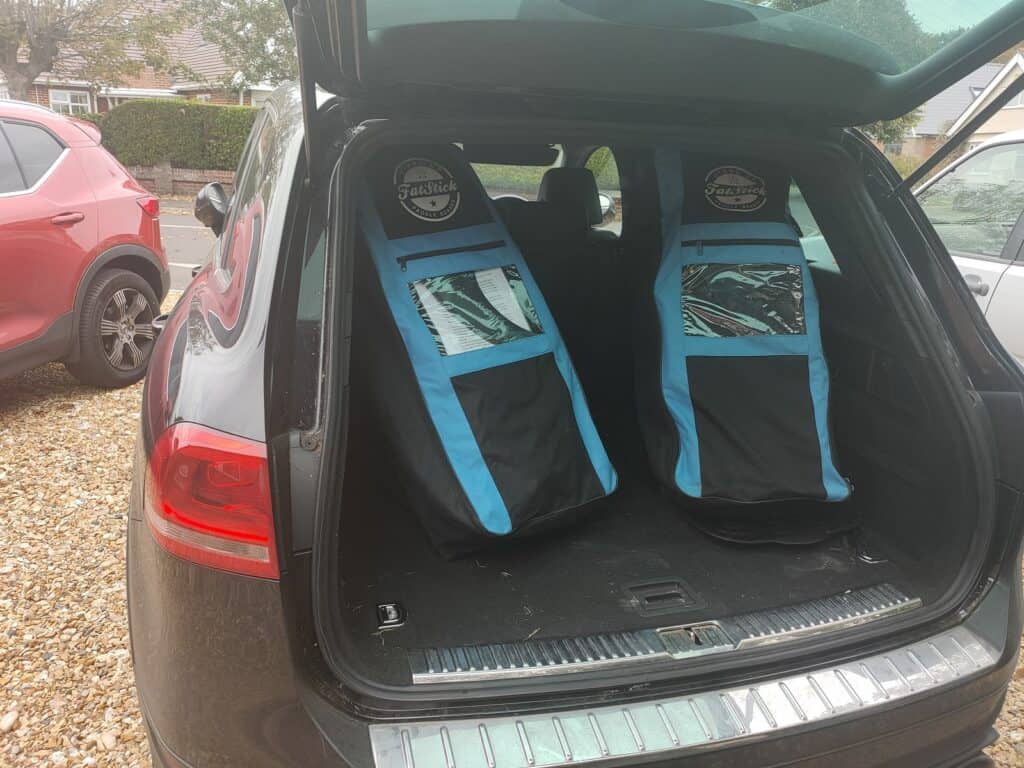
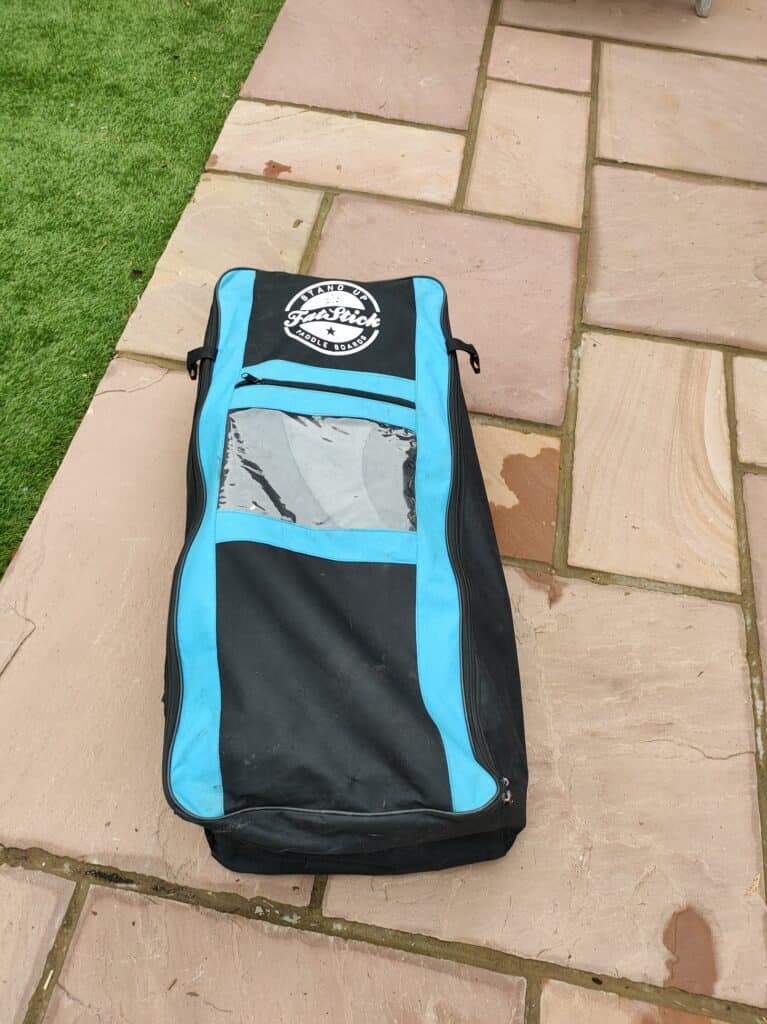
Inflatable Paddleboard
Deflate and pack away
So this may seem rather obvious but if you have an inflatable paddleboard you can simply just deflate the board, roll it up and pack it away in the provided carry bag.
Now I could go into great detail on how exactly you deflate and back away your board, but I have actually written a separate article on the matter so if you want to read that simply click here and open it up in a new tab so you can continue reading this one.
Roof Rack
The next option is the roof rack, if you need to have the board pre-inflated for transporting then the roof rack will be the best option.
Having read above you will now know that you can get fixed roof racks, soft roof racks or DIY roof racks.
Whichever option you go for, you can be safe in the knowledge that a roof rack will be a good way of transporting your inflatable paddleboard.
Inside the Vehicle
If you don’t have a roof rack, putting the board inside the vehicle is certainly still a viable option.
In fact it is considerably more viable to put the board inside the car when it is inflatable when compared to its rigid counterpart.
Being able to deflate the board allows you to contort it round headrests where needed, or you can take it a step further and deflate it to the point in which you can fold it or roll it up.
Once deflated to that extent it can be folded so that it fits in the boot or rolled up nice and tight and placed in the footwell.
When the board is inflatable and then by default deflatable you can really put the board just about anywhere in the vehicle regardless of how big or small the board or vehicle is.
On Your Back
The last method of transporting your board is a tried and tested one that will get you to and from all places regardless of whether you are planning on paddleboarding or not.
Inflatable paddleboards in nearly all circumstances are sold with a suitable carry backpack in which you can carry your board, paddle, fin, hose, repair kit and even your pump.
Basically everything you need to go on your next paddleboard adventure can be folded up, packed away and placed on your back.
Once on your back you can simply head to the water in whichever manner you traditionally would, whether this be walking, running, using your vespa.
Whatever your method for getting to the water you can do so with your board securely and comfortably on your back.