Owning a business that hires out paddleboards certainly offers insight into the major issues that people encounter on a day to basis when just getting into paddleboarding.
Paddleboarding is unlike most water sports in the way that is taking the world by storm and offering people who wouldn’t usually consider themselves a fan or participant of watersports, a way to experience the thrill us waterman (& Ladies) feel when we are on the water.
Paddleboarding like anything in life doesn’t come without its hardships and one thing I get requests about more than any other thing is.
How do you install the fin to the paddleboard?
Well the first thing to establish is which Fin type does your paddleboard use?
There are three fin types that are commonly found on paddleboards, these are as follows:
- Traditional Surf Fin
- Slide & Snap Fin
- Double Fang Fin
Whilst this does depend on the brand/ quality of the board you are buying or using, most paddleboards use a traditional fin which incorporates what is known as a US fin box.
![]()
If paddleboarding isn’t your first experience with watersports and you have tried surfing or other similar activities then this may not be so foreign to you.
However, for those of you have never had any experience with fin boxes that can be a bit daunting.
To put a fin on a paddleboard you must do the following steps:
- Unscrew the wingnut that contains the square washer from the fin
- Take the square washer and place this in the notch usually located in the centre of the fin box
- The square washer will drop into the notch and fall into a premade channel
- Using the wingnut push the washer down the channel slightly towards the nose of the board
- Slide the fin into the back of the fin box and then lower the front edge of the fin until the pre-drilled hole lines up with the square washer below.
- Once lined up install the wingnut to lock the fin in place in the fin box.
This is the simplest way to install a fin on a paddle board however I appreciate that some of these terms may not mean anything to you or you may even be thinking.
“That’s great and all but my board doesn’t have that fin type”
I want to ensure that you leave this article with all the information you need to make sure the next time you go to get on a board the fin won’t cause you any issues.
To do this I am going to give a step by step using diagrams and photos showing exactly how each fin type is installed and also what you need to install each fin type.
What Components Should I have To Install My Fin
Fortunately manufacturers have used a bit of brain power when designing these systems and you don’t need any tools or additional items to install these fins.
It is however, important that everything that comes from the manufacturer is present to ensure the fin is installed correctly and is not lost the second you get out on the water.
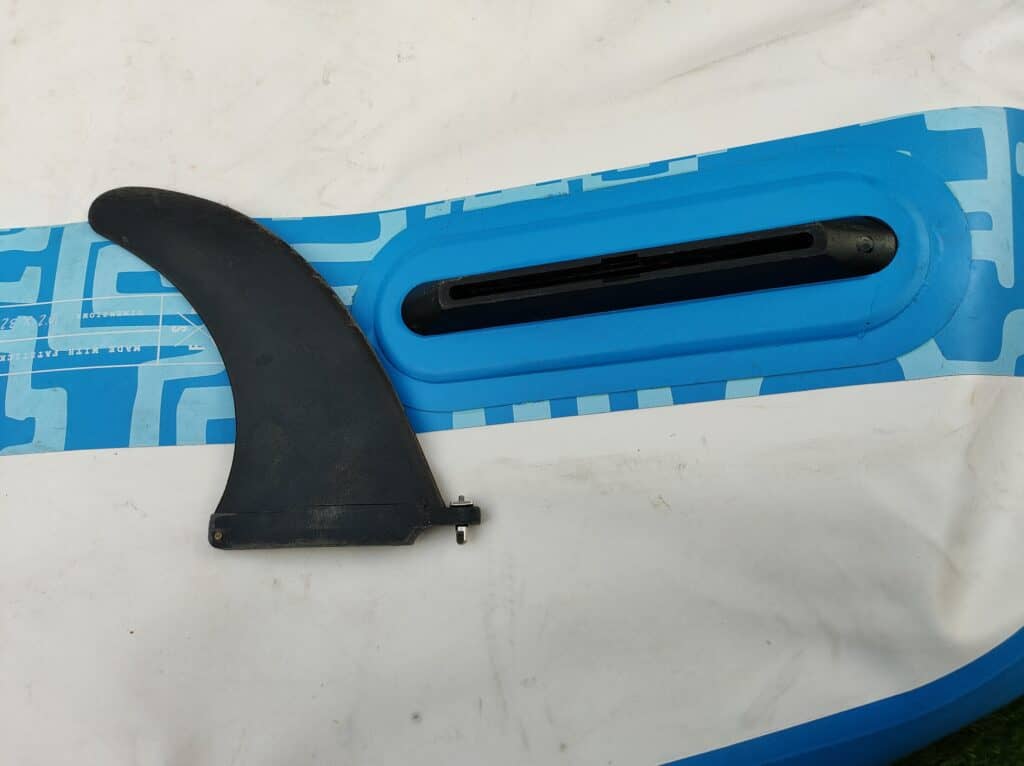
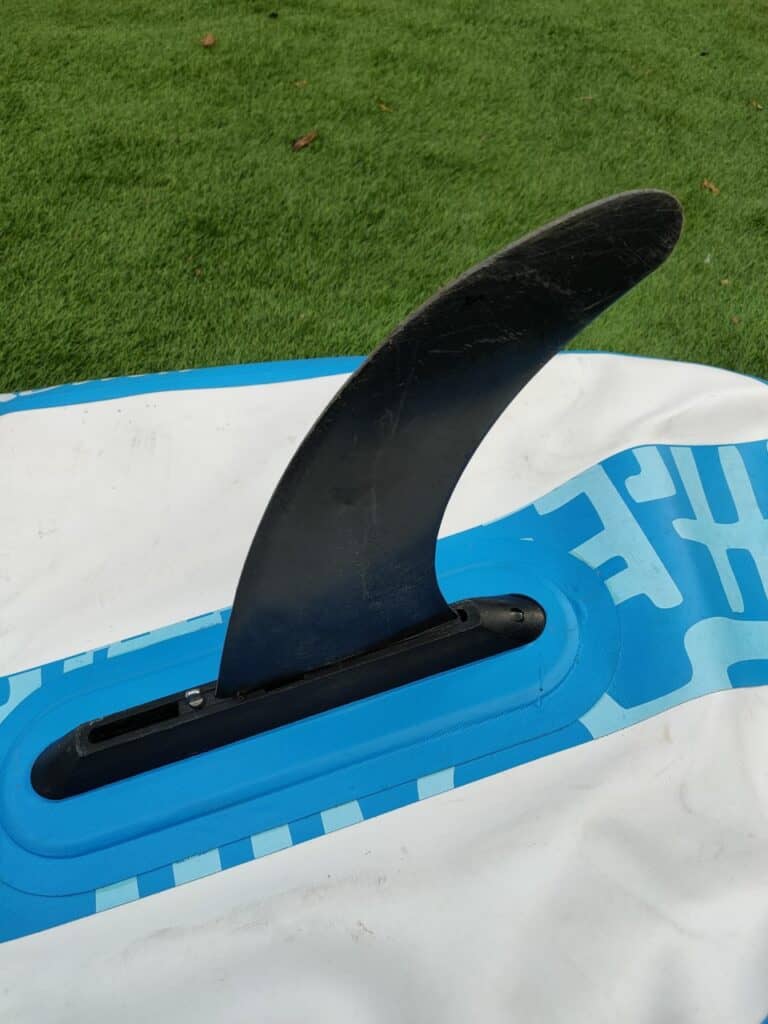
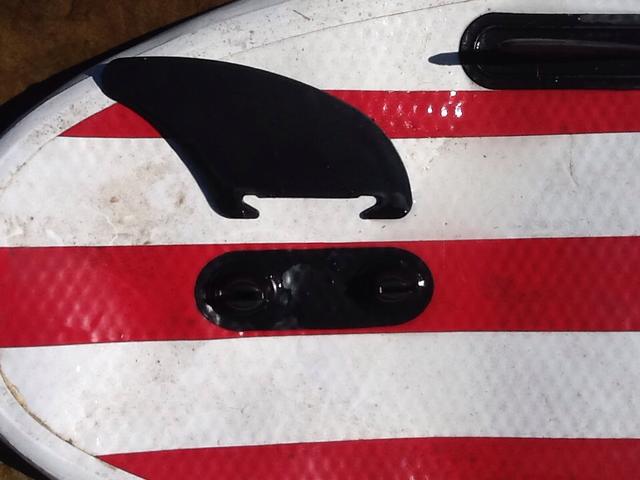
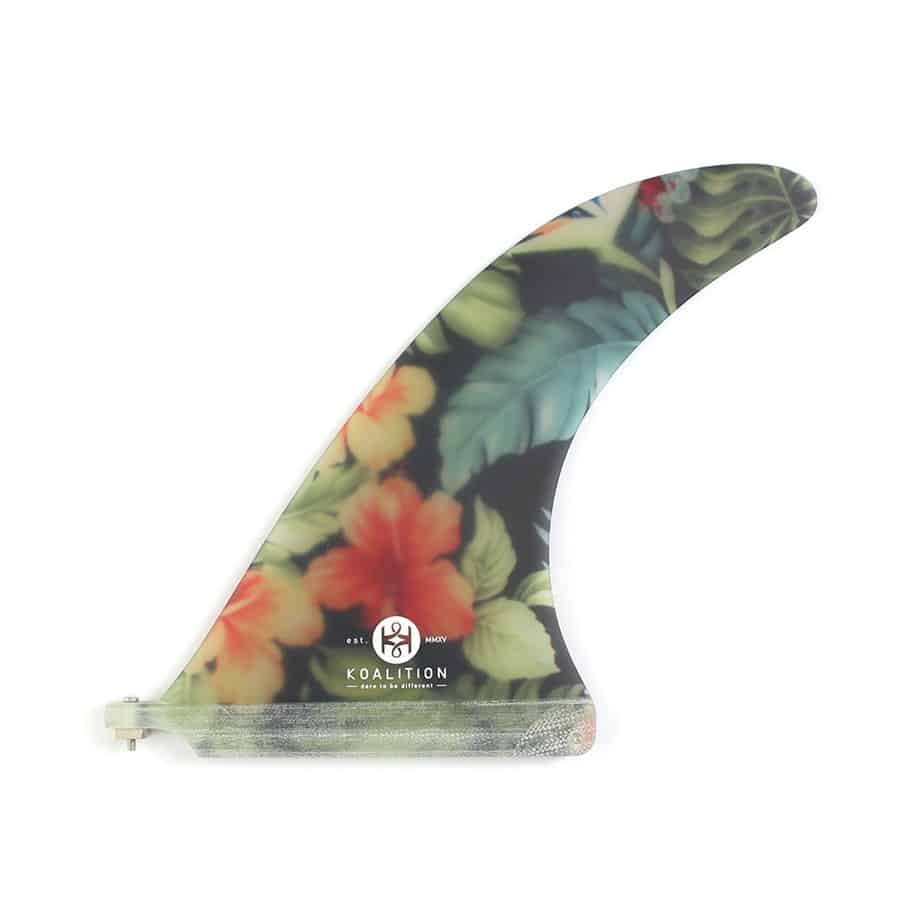
Traditional Surf Fin Components
To install the traditional surf fin you will need the following components pictured below.
The board containing the US fin box
The Fin itself
The Square Washer
The Wingnut
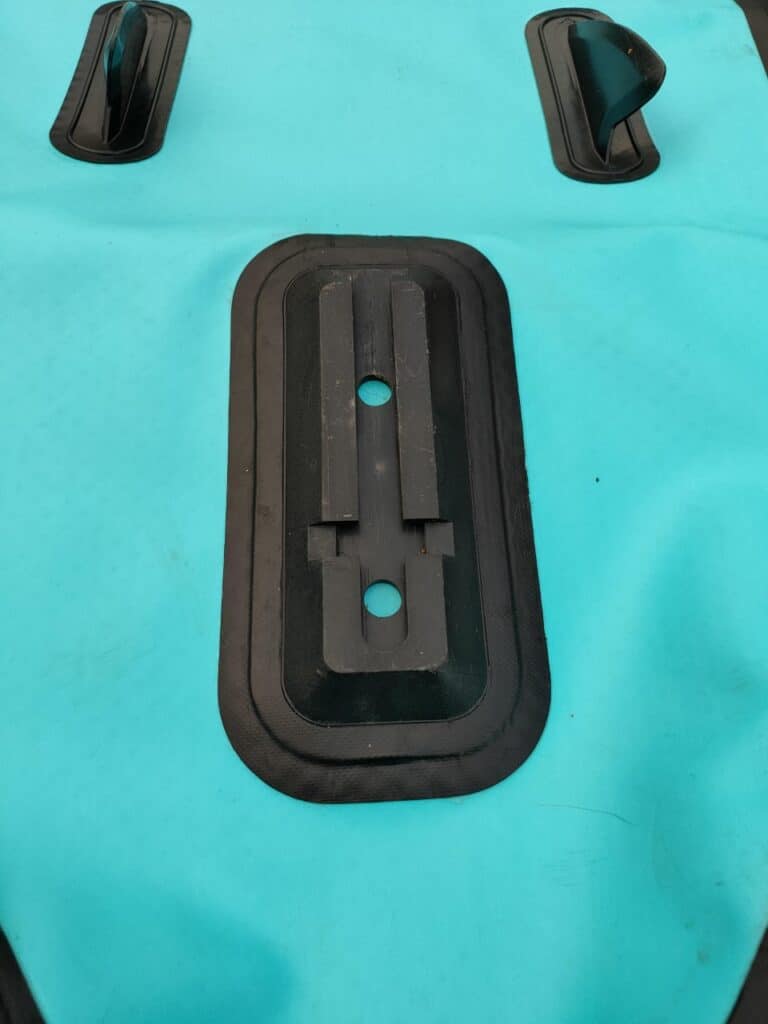
Slide and Snap Fin Components
To install the slide and snap fin you will need the following components pictured below.
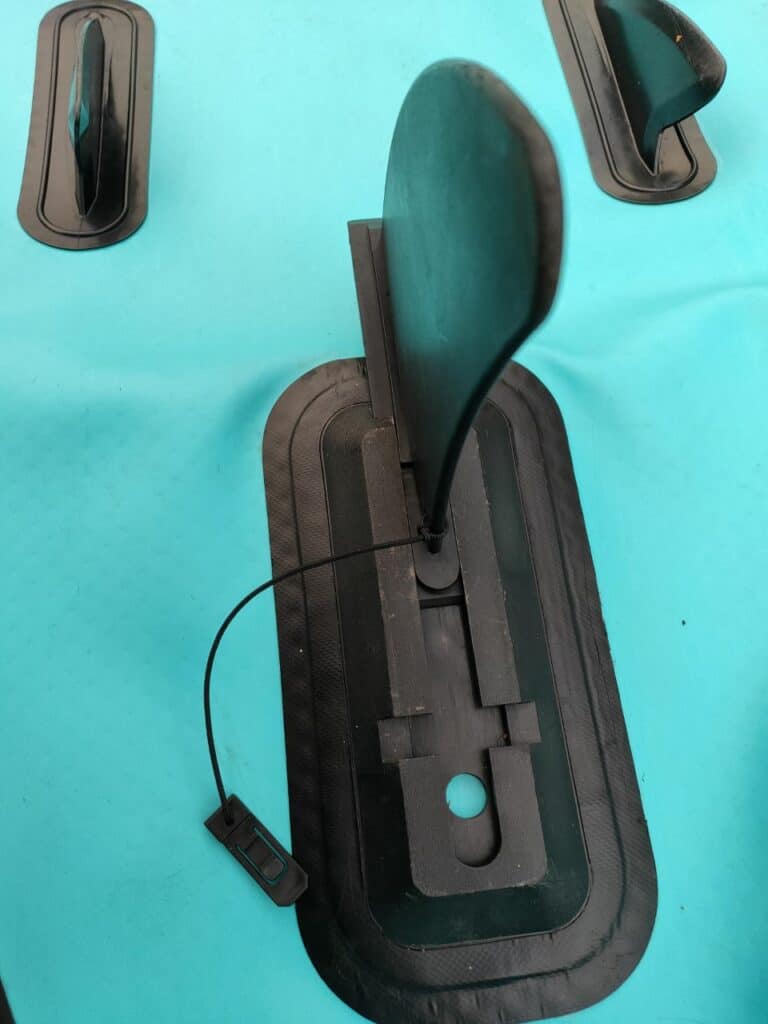
The board containing the fin box
The fin including string and snap lock
Double Fang Fin Components
No I will be honest I have personally owned and hired out upwards of 50 boards and never have I owned a board with this fin setup however the components you will need to install the double fang fin are pictured below.
The board containing fin box
The double fang fin
Step by Step Guide to Install Traditional Fin
Prior to starting the install we should first make sure we have the components listed above ready and available.
Once everything is ready we can move into step one.
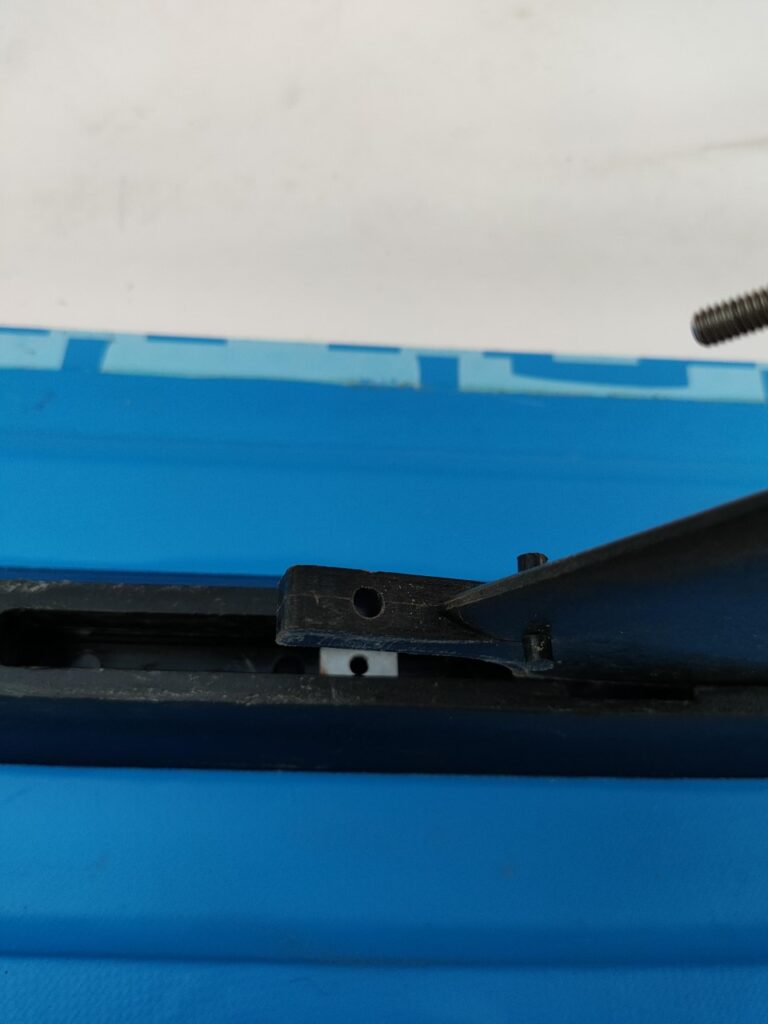
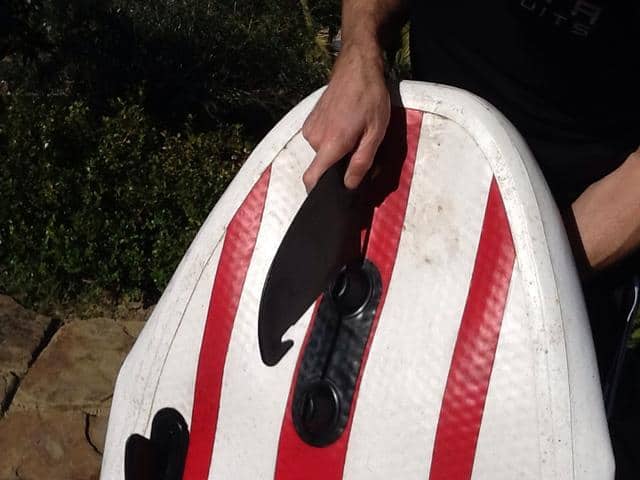
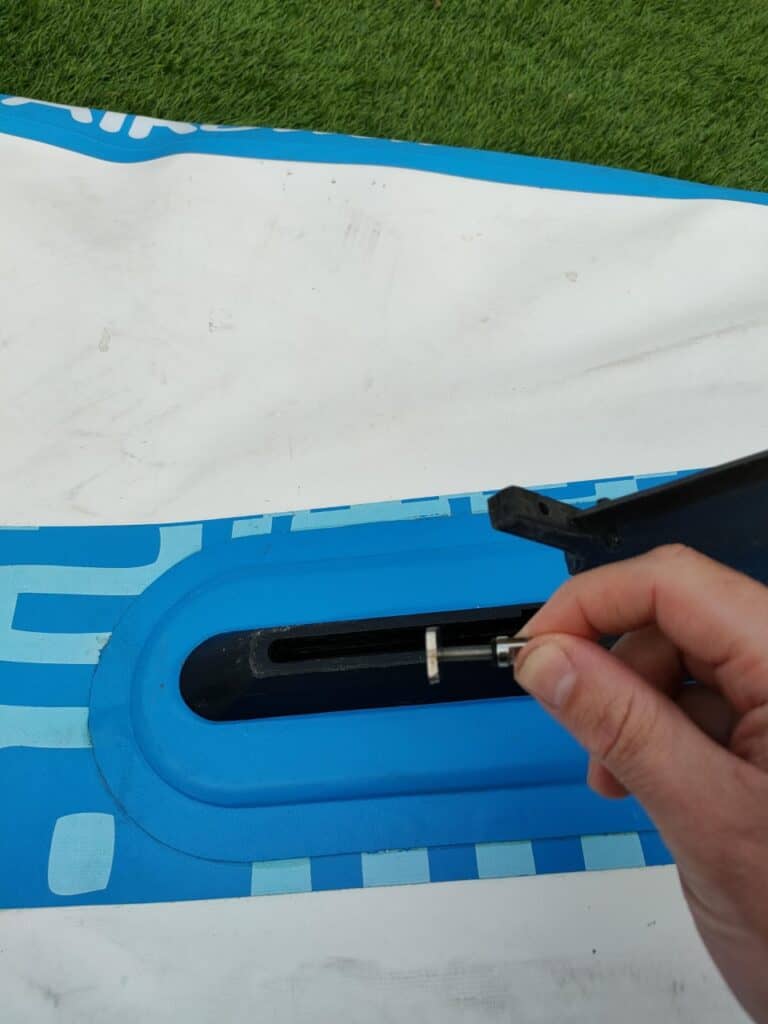
Step 1
First we need to flip the board onto its front so that the fin box is facing upwards and easy to access#
![]()
Step 2
Pick up the fin and you will notice there are two little notches at the base of the fin, these are often brass or silver.
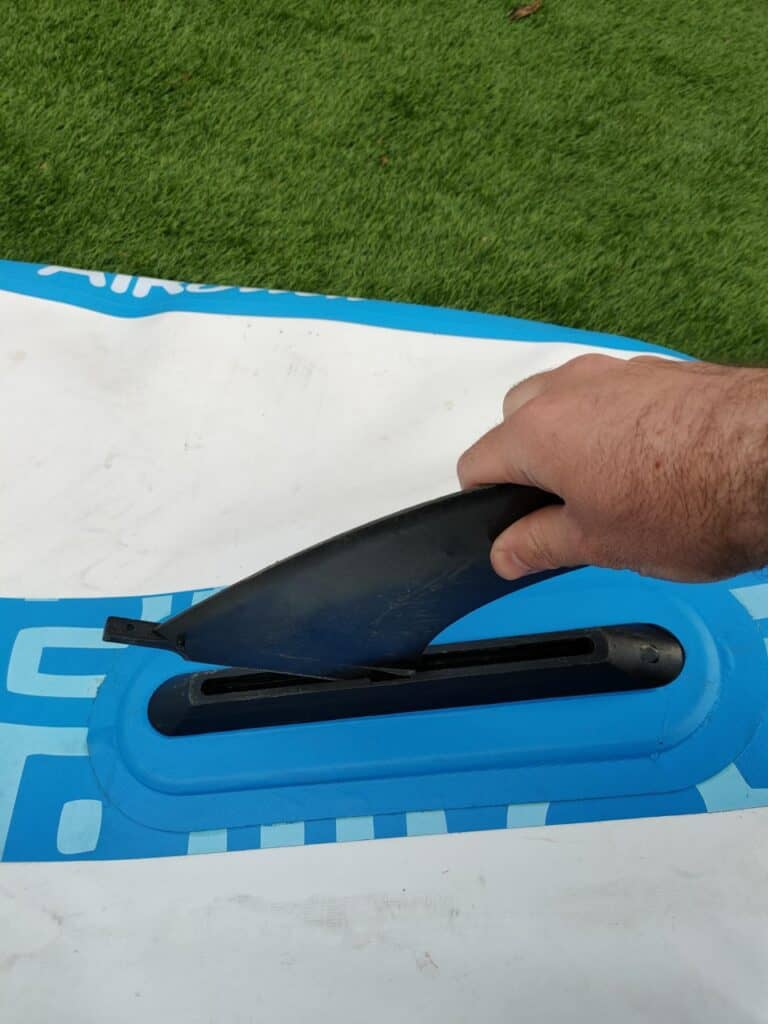
Place the base of the fin with the two notches into the open section in the US fin box, the notches will slide into a premade channel and the fin can be pushed back into the fin box.

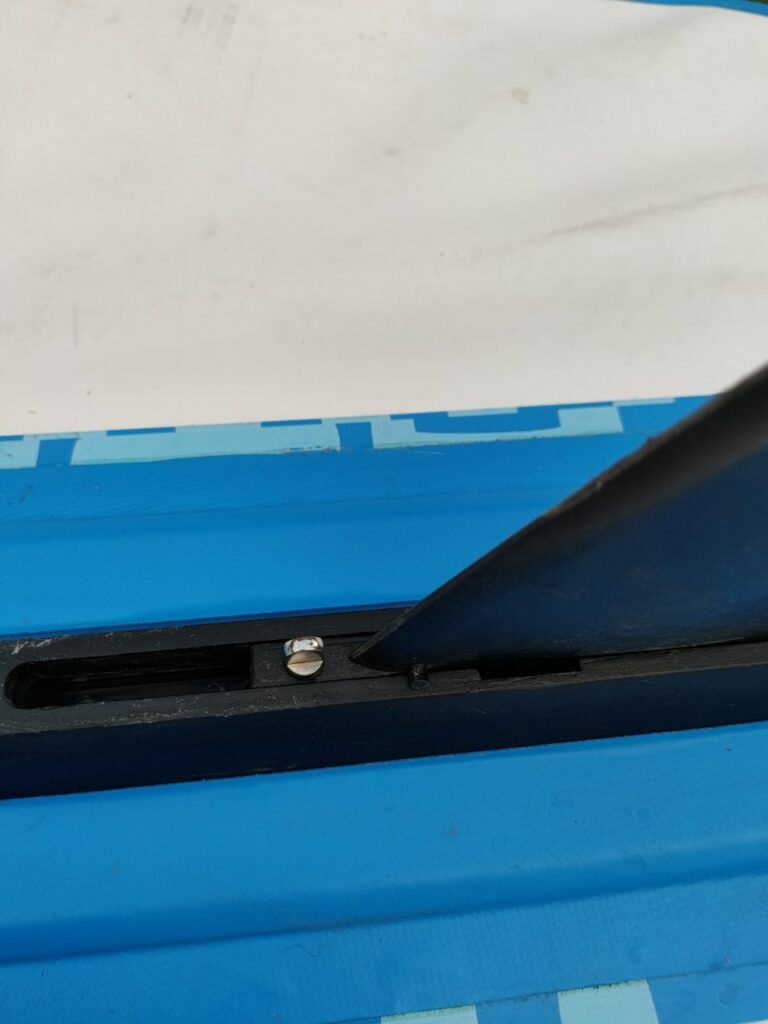
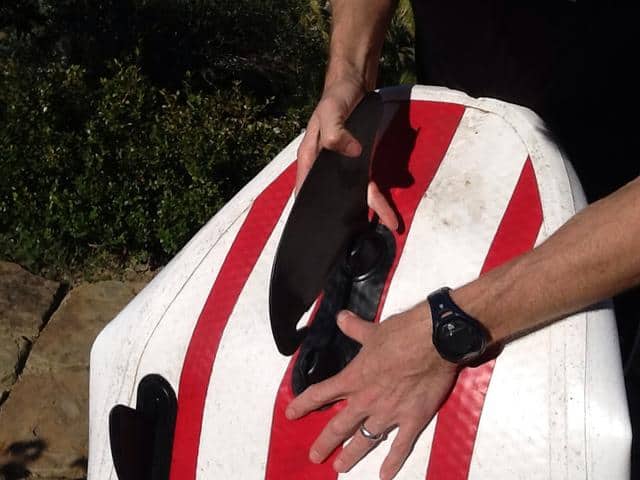
Step 3
Now the base of the fin is in the fin box, collect the square washer and again place into the open section on the fin box, once the washer falls into the channel, the washer will then need to be pushed along towards the nose of the board.
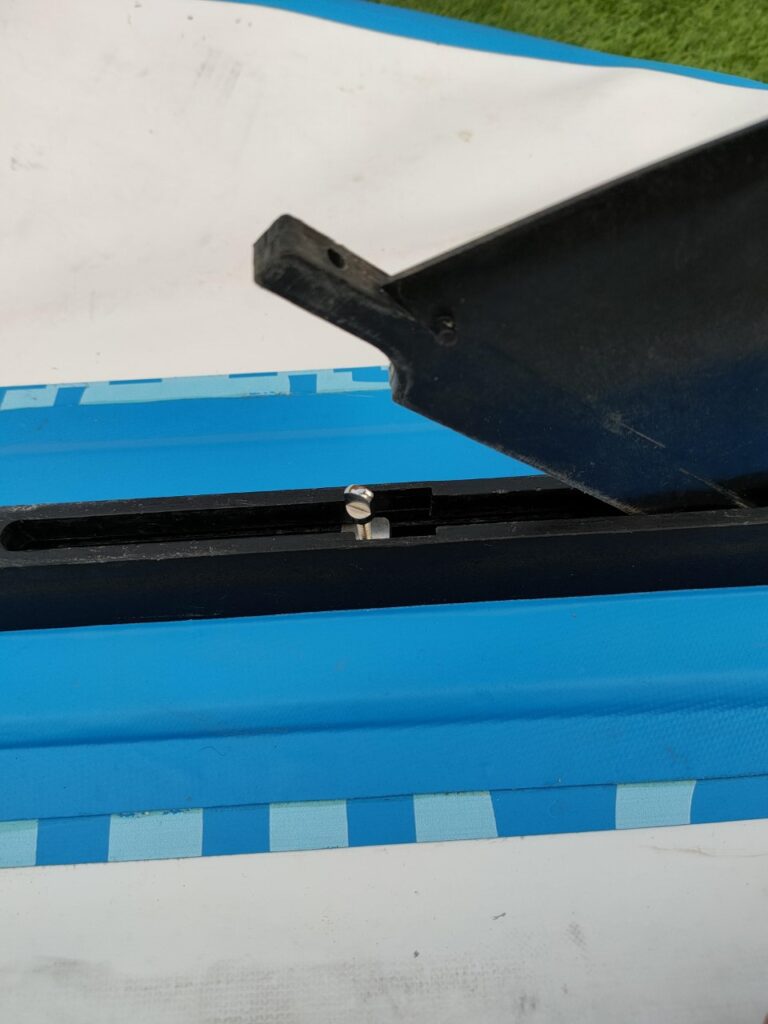
Step 4
Lower the fin into the fin box until the pre drilled hole lines up with the square washer. Once the holes are lined up, secure the fin using the wingnut.
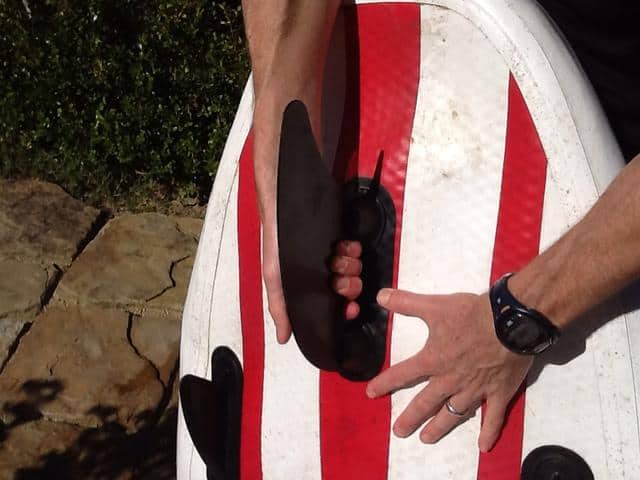
Step 5
Ensure the fin is tightly secured and don’t be afraid to give it a wiggle to make sure it’s snug.
Step 6
Enjoy your paddle.
Step by Step Guide to Install Slide & Snap Fin.
Prior to starting the install again we want to ensure we have the components shown above.
Step 1
Place the board on its front to ensure the fin box is facing upwards for easy access
Step 2
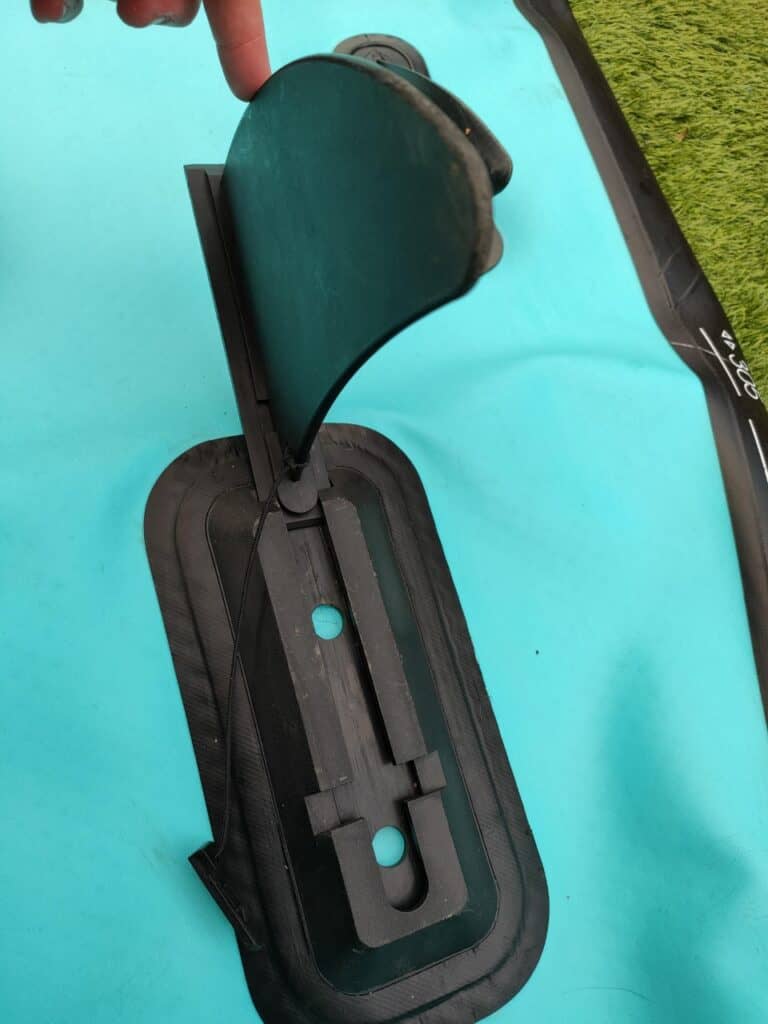
Collect the fin and ensure the point is facing towards the tail of the board, Line the base of the fin up with the opening on the fin box
Step 3
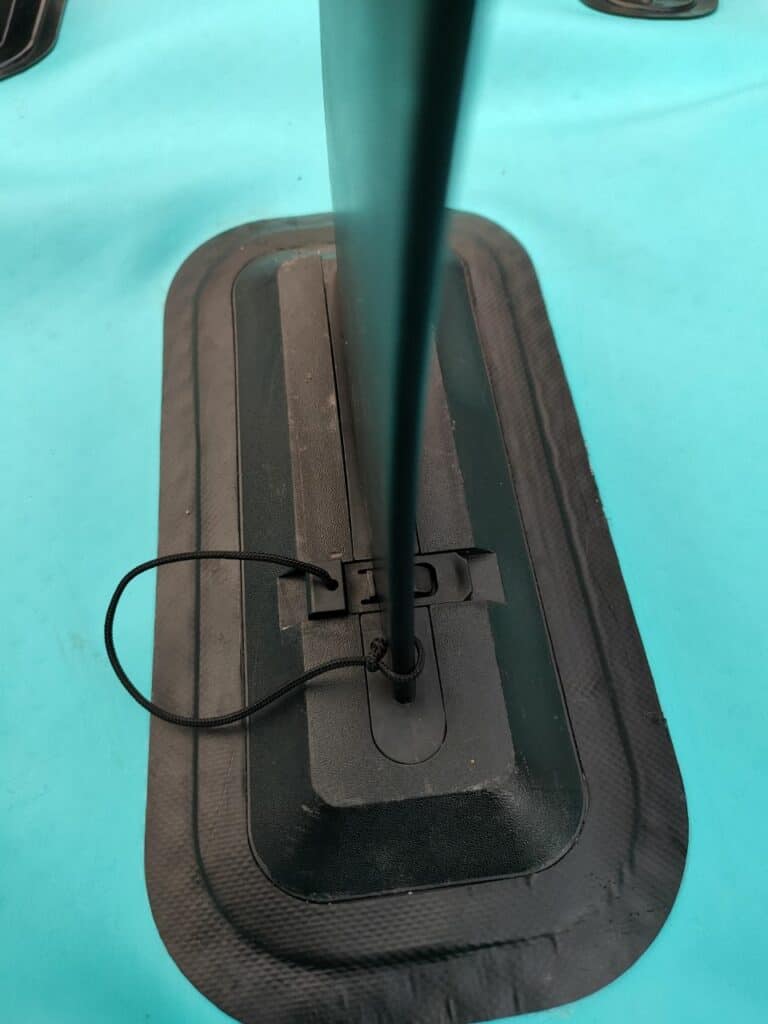
Holding the fin at the base, slide the channel into the runner of the fin box until the channel is fully inserted.
You will know the fin is fully inserted as you will see a hole through both the fin and fin box approximately half way in the fin box.
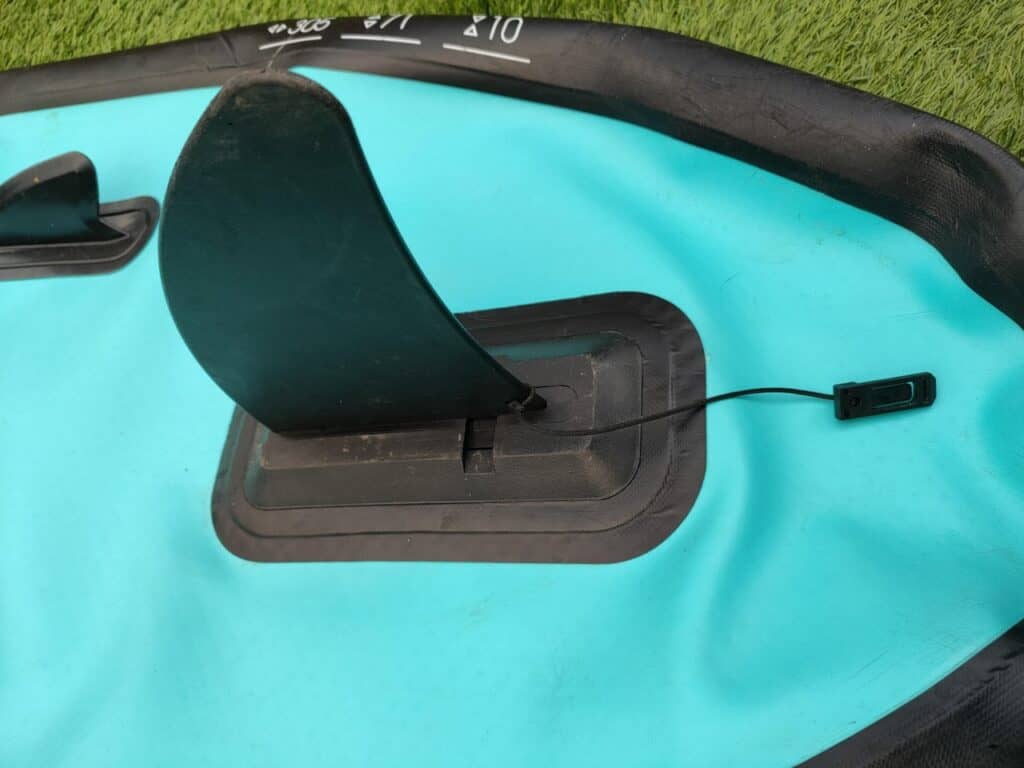
Step 4
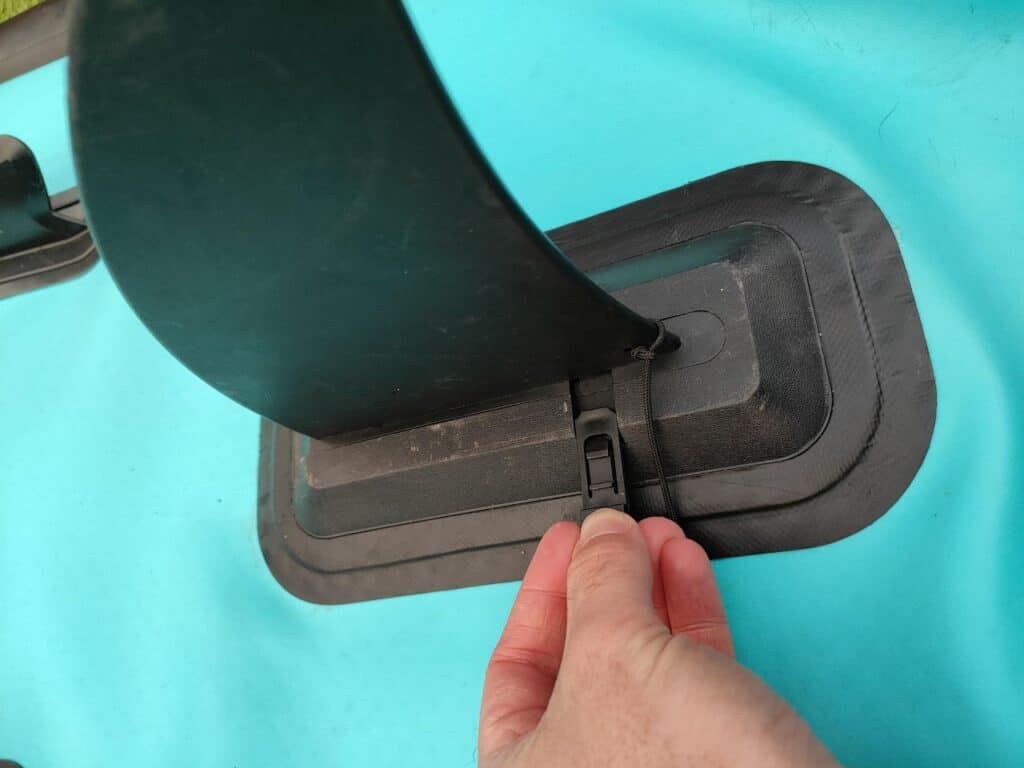
Locate the string with the locking clip and slide the clip into the hole noted above, the clip will slide all the way through the hole and lock into place.
Step 5
Ensure the fin is secure and again don’t be afraid to give it a wiggle to make sure it isn’t loose.
Step 6

Enjoy your paddle
Step by Step Guide to Install Double Fang Fin.
Now as I said out of the paddleboards I have personally owned and hired out I have never had a board with this fin system and I have only actually ever installed this once myself.
With that being said the below photos are not my own (Photo credit https://snapguide.com/) and your experience may vary.
Before starting any of the steps let’s make sure we have both the board and fin ready and accessible
Step 1
Ensuring the board is deflated, lay the board on its front to ensure the fin box is facing upwards for easy access.
Step 2
Pick up the double fang fin and lift the tail to make installation easier.
Step 3
Start by clicking the back edge of the fin into the notch on the fin box.
Step 4
Try to and bend/ crease the centre of the fin box inwards to bring the front and rear notch as close together as possible.
Step 5
When the notches are close enough, click the front edge into the fin box and ensure both fangs are secured in the fin box.
Step 6
Lay the board back down and give the fin a gentle pull to ensure it is tightly secured in the fin box.
Step 7
Inflate your board and enjoy your paddle
Pro’s & Con’s of the traditional Fin
As stated above the most common fin setup on a paddle board is the traditional fin with the US Fin box.
This is personally my favourite fin system albeit it’s not the easiest to install.
Pro’s
There are actually a couple of reasons as to why this set up is my favourite.
One of the pro’s to this system is the robustness and reliability.
Compared to the other two systems I feel this one offers the best reliability in terms of ensuring the fin does not come loose or fall out whilst being used.
On top of this should the fin become damaged or components get lost, they can easily be replaced by walking into any local watersports shop.
These fins are the most commonly used fins on surfboards so there is never a shortage.

The other pro to this system is that there is a diverse range of fins available to suit a US fin box.
This means you can adjust and tweak how your board glides, turns and performs on the water.
If you are more experienced and you are looking for a specific feel when paddleboarding the traditional fin system is definitely the one for you.
Con’s
I am not so in love with the system that I can’t pick up the obvious faults that come with this system.
The first con is that this system is a little complex when you first try to install the fin.
Obviously with all things in life the more you do it, the easier it is.
The second con is the small components such as the washer and wingnut can easily be lost especially if you are installing the fin on a loose sandy beach.
Now these items aren’t expensive by any means but it can get annoying if you are clumsy like me and drop them a lot.
Pro’s & Con’s of Slide and Snap Fin
This is the second most commonly used fin and is more commonly found on cheaper or budget models where the manufacturers have had to reduce costs.
Pro’s
The main obvious pro to this system is how straightforward and easy it is to install and remove.
The system is very simple and irregardless of your previous experience with this sort of thing I’m confident anyone can work out how to install this fin.
The second pro is that the fins are relatively cheap to replace should they get broken or damaged.
Con’s
The main con with this system is that the runner on the fin box gets easily filled up with sand and grit and if you don’t keep it cleaned out regularly the fin can be extremely challenging to get in or out of the fin box.
The second con is that the fins are often cheaply made meaning they are quite susceptible to breaking when run into shallow ground.
Pro’s & Con’s of Double Fang Fin
The double fang fin, very rarely seen and even more rarely complimented.
I was really scratching my head trying to think of some pro’s for this design and honestly I can’t come up with any.
Con’s
Con’s however I can think of a fair few.
Firstly by added the fangs and complicating the fin box it actually increases the manufacturing costs.
On top of this it is tricky to install the fin and you have to basically bend/ weaken the fin box to even get the fin secured properly.
Aside from all of these things I have seen a few horror stories circulating where the fins snap but the fangs of the fin remain jammed in the fin box.
In summary I would highly suggest you avoid this fin setup.